Sonntag, 12. Juli 2020

An Experiment in Making Spiral Wire

I love to work with Tenntråd and I love to make viking age posaments. I try to get as close to the appearance of the remnant pieces as I can. But still there was the problem of the material. Tenntråd is lovely to work with, but it is a relativly modern material. The Sami people fabricate it and work with it in their traditional craft, making beautiful embroideries and braided bracelets and necklaces.
The material at the Birka burials isn't Tenntråd, though. According to A. Geijer the spiral wires used for the posaments consisted either of a drawn gold or silver wire with a round cross section wrapped around a silk core:

"1. Drahtgold oder Drahtsilber: ein massiver, im Querschnitt runder Draht, der durch ziehen hergestellt ist. Es kann in der Stärke recht beträchtlich variieren.
2. Spiralgold oder Spiralsilber besteht aus einem derartigen Draht, der in dichten gleichmässigen Windungen um eine textile Seele gewunden ist, die jetzt aber meist vermodert ist. Diese Seele ist nur in etlichen sehr stark korrodierten Stücken mit Silber erhalten und konnte als Seide bestimmt werden; vermutlich wurde aber überall Seide als Stütze für die Spirale verwendet." (Geijer, A.: Birka III - Die Textilfunde aus den Gräbern, Almquist & Wiksells, Uppsala, 1938, p. 68.)

So insdead of using the rather modern pewter wire from Scandinavia I wanted to try making my own spiral silver.
I made some attempts earlier, but since I dindn't have the right tools I was not very happy with the outcome.

The procedure of making the spiral wire seemed similar to that still used today by some Sami craftspeople. Obviously for big scale production of Tenntråd machines are used nowadays, but there are still people around who know how to make the wire by hand. I found this very helpful video from Norway, 1984:
https://www.nb.no/nbsok/nb/6f0a0f1eb2841bd2a98c1358864bb718.nbdigital?lang=no

For my own first experiment I used
  • Kromski drop spindle, top-whorl, 85g
  • Silver coated copper wire, 0,2mm
  • Serafil 20, 100% polyester, z-plied
  • Lazy Kate to hold the wire

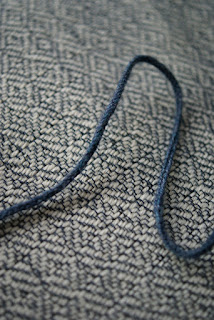
I tied the core yarn to the spindle and started to wrap/z-spin the wire around the core, very much like core spinning with textile fibres. There were little gaps between the individual coils, so I had to stop after a while an push the coils down with my fingertips to get an uniform spiral wire.


I measured 1m of the craft wire to give me an idea how much spiral wire could be made of this length.
I was able to make 11,8cm of spiral wire from 1m of the silver coated 0,2mm copper wire in about 16 minutes.
I guess the time will improve with skill, this was measured during my first try.


When I had enough spiral wire for a test braiding, I went for a simple P9 Birka posament. The spiral wire I made was not as smooth to work with as the Tenntråd. I guess the copper work hardened while coiling it. So the next step will be to get some fine silver wire and real silk as core material.
But I'm quite happy with the overall outcome and the technique works very well to produce a considerable amount of spiral wire, which is needed to make Birka posaments.


Donnerstag, 7. November 2019

An Experiment in Nettle Fibre Extraction

Recently the interest in nettle fibre production has grown a lot. Fashion designers tend to use more sustainable resources and nettle is on their agenda now for some time.
Extracting fibre from the Stinging Nettle, Urtica dioica, is nothing new throughout Europe.
Ötzi, the Tyrolean Iceman (dated between 3400 and 3100 BCE), used nettle fibres for the fletching of his arrows, he secured the feathers with fine nettle thread.
Then there is an interesting find from Denmark. In Voldtofte a shroud was found which consisted of fine woven nettle fabric. The fibres were analyzed and the results showed that the nettle fibre or the fabric itself was imported from the Styria region in Austria. This shows how important nettle production must have been during the Bronze Age, though flax already was cultivated and used for fibre purposes, too.
Later, in the 18th century, there have been endeavours to commercialize nettle cultivation on a big scale in Europe, but since nettle only has a fibre content of ca. 10%, other fibre plants were preferred.
During WWI there was no chance for Germany to geht hold of cotton, especially needed for durable uniforms. So people were asked to collect nettle stems and to bring them to collecting points. Farmers got money for cultivating nettle. Posters were found throughout Germany:


It was only after WWII, that nettle and other native fibre plants in most parts of Europe were replaced with cotton, since it was available again and the production costs got cheaper and cheaper.


Now, here is my own little experiment with nettle fibre.

It started with a bit of already processed fibre which I got from a friend at Lauresham. These fibres are carded and bleached. I spun this test batch on a drop spindle and I like the result. I plan to weave a little test patch from it soon, to see how it will behave when woven.


 So, the next step was to try to get fibre from fresh nettles. When Fimbulmyrk was here over the weekend, we took some tea with us and went into the forest. We gathered some nettle stalks and sat down on a big tree stump.

This is only one possibility to process nettles, there are many more and it seems that everyone doing this has their own tricks and preferences.

First of all we had to get rid of the leaves. But you can't strip them off like you wold do with peppermint, holding the tip and running your hand along the stem, as you would tear off some of the precious fibre, too. So you need to start at the bottom part. put on some gloves and pull the leaves and side stalks off very gently.

Now you should have some nice naked nettle stems. To get rid of the little hair which cause the stinging, run your hands along the stems a few times to brake off the hair.

In the next step you have to break the nodes. We took a random Stone from the ground and gently broke those thicker parts of the stem with it.


Now for the fun part: Scraping off the fibres with a knife while rotating the stem in your hand


Here is a little video showing the technique a bit closer:


What you end up with should look something like this:


With some of the fibres I then started a little experiment in itself. I made a simple cottage cheese by stirring some vinegar in warm milk. Then I took some of the fibres and put them in the remaining whey, weighted down with a saucer. I had initially planned to leave the fibre soaked only for some days, but life got in the way and I ended up with several weeks.


  But to my relief the fibres were still fine and the majority of wood particles had fermented away, as I had hoped for. The fibres are a bight brighter in colour now and much softer than the ones I only dried:

But I couldn't wait and since it was quite warm the fibres dried fast and I could do some test carding and spinning the same evening and I have to say, I was quite pleased.


Well, as I wrote, there were some weeks before I returned to my appartment. But that time wasn't nettleless, oh no! I camped at a medieval event and I had the opportunity to show people my endeavours in fibre extraction. They all were very interested, especially the children couldn't believe that this soft fibre once stung!
I told how to extract the fibres and showed how to card and spin them.


So, I guess, there is more to come soon! :D
And Fimbulmyrk seems to like working with nettles, too. When he arrived here for the weekend the last time, he showed me some lovely cord which he had made from nettle fibres and he brought me flowers! A whole bag full. Stripped ones. Well, nettle fibre, yes. And I like it a lot!


Oh, and the good thing about stinging nettle is, after stripping the leaves off and doing some hard work scraping, carding and spinning, you can reward yourself with some nettle tasties, like this pasta sauce frome nettle leaves, cream, salt, pepper and nutmeg.

 What a plant!


Dienstag, 5. November 2019

Birka Triangular Braid

During the last couple of weeks people in various viking age related groups on FB kept on searching for the technique to recreate a woollen braid from Birka. Several of these braids have been found, mostly to finish upper edges on apron dresses and most of these braids from Birka have a triangular cross section, as Geijer states in "Birka III. Die Textilfunde aus den Gräbern" (p. 128) You can download the Birka books here for free, directly from the Historiska Museet homepage!
Some people suggest finger loop braiding as the technique to achieve the right braiding pattern, but since I din't come across a pattern that would recreate a close enough resemblance to the original piece for my liking, I left it out.
Another possibility would be a different form of loop braiding, recently known as scoubidou braiding.
It is possible to get a triangular profile with this kind of braiding. If you use 3 strands of yarn, you will end up with a braid, that looks triangular from the top, but the problem is, it still turns into a spiral shaped braid, which is not the look of the original braid from Birka.


So, let's try another technique. 5 single strands of yarn, starting with a simple kot and securing it with a pin to a surface of your liking. I like to pin it to the knee and sit somewhere comfy.

I used different colours, so you can actually see what is happening while braiding.
First, put two strands on one side and the remaining three strands on the other side.


Then put thread 5 over 4, 3 and 2, placing it between 1 and 2.


Now, place thread 1 over 5 and 2, placing it between 2 and 3.


Take thread 2 and kind of twist it over 1, so it now is placed between 1 and 3.


 At this point I normally would tighten the whole thing, but I left this step out in this tutorial, as you wouldn't be able to see, what's happening next.
But please, if you try this, now is the perfect time to tighten your braid!


Basically, the braiding now starts from the beginning.
Put strand 4 over 3, 2 and 1, placing it between 5 and 1.


Put 1 over 4 and 1.


Twist 1 over 5, then tighten again.

If you follow these steps over and over again, you will end up with a braid like this:

Front

Back


To show you that this braid has a triangular cross section indeed, I put some pins on the sides of the braid:


Triangular indeed! :D


And how does it look in direct comparison the the original one from Birka?


Well, I guess we have some resemblance there, more than with any of the other techniques.
(Picture from "Birka III. Die Textilfunde aus den Gräbern", Tafel 33:7)


 A problem I came across while braidind was not loosing track of where I was, or rather where the threads should be when making a break. I solved this problem for me by using a scrap piece of cardboard and cutting some slots in it, so I could secure all the threads and the braid and start again after the break without any problem.


By using sock yarn weight wool I ended up with about the same size of the original piece.
I think I will use this as part of the new apron dress I'm planning with this lovely wool broken diamond twill soon! :)


Related Posts Plugin for WordPress, Blogger...